Configuring OpenVPN Client for connectivity on Windows
Now that OpenVPN has been installed, we can import the VPN configuration file. This file along with your username and password will be provided to you by a member of the NetFire team.
Importing configuration file and connecting to the VPN
-
Begin by running the OpenVPN application. This can be done by clicking the windows Icon at the bottom left-hand corner of your screen and searching for OpenVPN. Click on the application to run it.
-
An icon will appear in your system tray at the bottom right-hand corner of the screen that looks like this.
Gray colored VPN status icon indicates that there are no active VPN connections established.
-
Right click on the OpenVPN Icon as pictured above and hover over “Import” from the options listed.
-
Select “Import file….” from the extra options listed. This will open File Explorer

Right click on the VPN status icon to open menu.
- If you have not already downloaded your OpenVPN configuration file provided by NetFire, do so now.
- Navigate your downloads folder and find the configuration file.
- Double click on this file to import it.
- Once complete, right click on the OpenVPN Icon in the system tray.
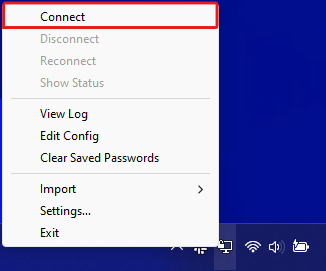
- A list of options will appear. Select "Connect" from the options listed

Select connect from the options listed
-
A window will appear prompting you for your login credentials. Use the credentials that have been provided by NetFire (Usually the credentials that would be used to log into your computer).
-
The OpenVPN Icon will appear yellow while it attempts to connect. Once the connection has been established, it will turn green.

Yellow colored VPN status icon indicates that a connection is attempting to made.

Green colored VPN status icon indicates that a connection has been successfully established.
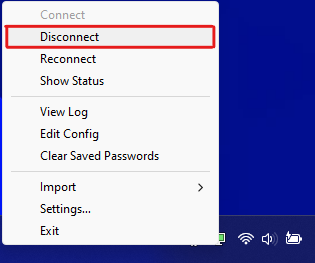
- If you wish to disconnect from the VPN, right click on the OpenVPN Icon in the system tray and select "Disconnect" from the options listed

Select Disconnect from the options listed
For security reasons it is recommended that you only connect to your VPN only when you need to access resources in NetFire Cloud.
Do not keep persistent connections when not necessary.
Updated over 1 year ago
